There’s
some old stories in the Catachan fluff about how the Catachans like
Ogryns. There’s something about the
straightforward, no-nonsense approach both groups have to warfare that make
them bond. They’ve even got more
specific stories, like how Nork Deddog served with the Catachan II for years.
So when my Catachan army started coming together, Ogryns were kind of a no-brainer. What army can’t benefit from a pile of brainless muscle that shrugs off damage and hits like... well, like a pile of brainless muscle?
But seriously! Twenty-two bucks per model? That’s $66 for a bare-bones squad of three. And even with the drastic remodelling, the Games Workshop Ogryns still look... well, a bit goofy.
So I started looking at other options.
 A box of
Fantasy Ogre Bulls is just forty dollars for six models--less than a third the price.
If you’re willing to go with fewer options, you can buy them piecemeal online
and save even more. Ogres are big and
beautiful, in a modelling sense. They’re
so big there’s lots of room for modifications and modelling.
A box of
Fantasy Ogre Bulls is just forty dollars for six models--less than a third the price.
If you’re willing to go with fewer options, you can buy them piecemeal online
and save even more. Ogres are big and
beautiful, in a modelling sense. They’re
so big there’s lots of room for modifications and modelling.
First thing is the feet. The soles of the ogre boots are metal, but they’re also pointed. It goes with the whole Mongol tribesman look that you can see all through the Ogre Kingdoms line. I snipped off the pointed tip and used a file to round it down. The Imperial Guard isn’t going to have anyone prancing around in pointed shoes like Mr. B Natural.
 On the
torso, I used a knife to carve down the edges of the gut-hole. They’re just a bit too sharp as is, and reach
out a bit too far. I don’t mind Ogryns
looking big, but they shouldn’t look drastically overweight. Then I filled the hole with little scraps of
plastic sprue and put a few drops of plastic glue on it.
On the
torso, I used a knife to carve down the edges of the gut-hole. They’re just a bit too sharp as is, and reach
out a bit too far. I don’t mind Ogryns
looking big, but they shouldn’t look drastically overweight. Then I filled the hole with little scraps of
plastic sprue and put a few drops of plastic glue on it.
Once that dried, I made a little ball of green stuff (about half the size of a pea) and pressed that on top of the scraps. A little work with the sculpting tool made it match up with the rest of the body. I was even able to sculpt really simple abdominal muscles. It’s not that hard, honest. I did it while splitting my attention between sculpting and watching reruns of Firefly. Just make a cross in the green stuff and smooth it out in all directions.
 That’s a
good point, actually. One nice thing
about the ogre bodies is that they’re so big it takes a lot of the pressure off
me as a modeler. Like I mentioned above, I’ve got space to work,
and on these guys tiny mistakes are... well, tiny. It’s not like when you’re trying to put hair
on a Space Marine and one wrong pass with the sculpting tool gives your veteran
sergeant a reverse-mohawk. When it comes
to green stuff I’m a mediocre sculptor at best, but even I could pull these
details off.
That’s a
good point, actually. One nice thing
about the ogre bodies is that they’re so big it takes a lot of the pressure off
me as a modeler. Like I mentioned above, I’ve got space to work,
and on these guys tiny mistakes are... well, tiny. It’s not like when you’re trying to put hair
on a Space Marine and one wrong pass with the sculpting tool gives your veteran
sergeant a reverse-mohawk. When it comes
to green stuff I’m a mediocre sculptor at best, but even I could pull these
details off.
Then I took a sliver of green stuff and rolled it into a tiny snake. This got flattened across those new abs to make a continuation of the belt. Just like above, I used my sculpting tool to smooth and blend it into the belt on the model. It got topped off with a little 1/4” piece of plastic for a belt buckle.
 I also
rolled a longer snake and used this to make a strap across the Bone‘ead’s chest
and over his shoulder. It gives me a
little something more to make him stand out.
I’m not worried about it being perfect because I’m going to stick gear
all over it.
I also
rolled a longer snake and used this to make a strap across the Bone‘ead’s chest
and over his shoulder. It gives me a
little something more to make him stand out.
I’m not worried about it being perfect because I’m going to stick gear
all over it.
One more detail on the Bone ‘ead. I used a spare icon/ clasp from the Space Marine Commander set on his belt buckle. The way I see it, his belt was probably a packing strap on a Baneblade that some Techpriest gave the Bone‘ead as a thank-you present for pushing it out of the mud or something. It’s a small, simple detail that helps the Bone’ead stand out a bit more.
 I wanted to
give my Ogryns pouches and bandoliers to help sell their military aspect and
also to distinguish them from Fantasy Ogres.
The best thing to use was Space Marine pouches. If you play any type of Space Marines, you
know there’s that one double-pack pouch that’s just a bit too big. It’s tough to plant it anywhere on a Marine
and not have it look like a little bit of overkill. But on an Ogryn, scale-wise, it’s
perfect. It looks just like an ACU belt
pouch would look... if you were making them for nine-foot barabrian giants.
I wanted to
give my Ogryns pouches and bandoliers to help sell their military aspect and
also to distinguish them from Fantasy Ogres.
The best thing to use was Space Marine pouches. If you play any type of Space Marines, you
know there’s that one double-pack pouch that’s just a bit too big. It’s tough to plant it anywhere on a Marine
and not have it look like a little bit of overkill. But on an Ogryn, scale-wise, it’s
perfect. It looks just like an ACU belt
pouch would look... if you were making them for nine-foot barabrian giants.
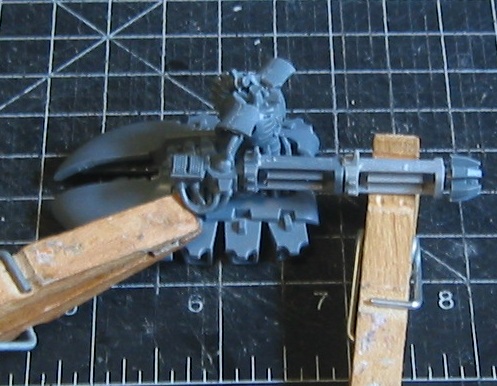
Next time I’ll show you how I built some ripper guns for these guys, and also look at the Penal Legion Ogryns I built a while back that were the unofficial test run for these guys.
So when my Catachan army started coming together, Ogryns were kind of a no-brainer. What army can’t benefit from a pile of brainless muscle that shrugs off damage and hits like... well, like a pile of brainless muscle?
But seriously! Twenty-two bucks per model? That’s $66 for a bare-bones squad of three. And even with the drastic remodelling, the Games Workshop Ogryns still look... well, a bit goofy.
So I started looking at other options.
 A box of
Fantasy Ogre Bulls is just forty dollars for six models--less than a third the price.
If you’re willing to go with fewer options, you can buy them piecemeal online
and save even more. Ogres are big and
beautiful, in a modelling sense. They’re
so big there’s lots of room for modifications and modelling.
A box of
Fantasy Ogre Bulls is just forty dollars for six models--less than a third the price.
If you’re willing to go with fewer options, you can buy them piecemeal online
and save even more. Ogres are big and
beautiful, in a modelling sense. They’re
so big there’s lots of room for modifications and modelling.First thing is the feet. The soles of the ogre boots are metal, but they’re also pointed. It goes with the whole Mongol tribesman look that you can see all through the Ogre Kingdoms line. I snipped off the pointed tip and used a file to round it down. The Imperial Guard isn’t going to have anyone prancing around in pointed shoes like Mr. B Natural.
 On the
torso, I used a knife to carve down the edges of the gut-hole. They’re just a bit too sharp as is, and reach
out a bit too far. I don’t mind Ogryns
looking big, but they shouldn’t look drastically overweight. Then I filled the hole with little scraps of
plastic sprue and put a few drops of plastic glue on it.
On the
torso, I used a knife to carve down the edges of the gut-hole. They’re just a bit too sharp as is, and reach
out a bit too far. I don’t mind Ogryns
looking big, but they shouldn’t look drastically overweight. Then I filled the hole with little scraps of
plastic sprue and put a few drops of plastic glue on it.Once that dried, I made a little ball of green stuff (about half the size of a pea) and pressed that on top of the scraps. A little work with the sculpting tool made it match up with the rest of the body. I was even able to sculpt really simple abdominal muscles. It’s not that hard, honest. I did it while splitting my attention between sculpting and watching reruns of Firefly. Just make a cross in the green stuff and smooth it out in all directions.
 That’s a
good point, actually. One nice thing
about the ogre bodies is that they’re so big it takes a lot of the pressure off
me as a modeler. Like I mentioned above, I’ve got space to work,
and on these guys tiny mistakes are... well, tiny. It’s not like when you’re trying to put hair
on a Space Marine and one wrong pass with the sculpting tool gives your veteran
sergeant a reverse-mohawk. When it comes
to green stuff I’m a mediocre sculptor at best, but even I could pull these
details off.
That’s a
good point, actually. One nice thing
about the ogre bodies is that they’re so big it takes a lot of the pressure off
me as a modeler. Like I mentioned above, I’ve got space to work,
and on these guys tiny mistakes are... well, tiny. It’s not like when you’re trying to put hair
on a Space Marine and one wrong pass with the sculpting tool gives your veteran
sergeant a reverse-mohawk. When it comes
to green stuff I’m a mediocre sculptor at best, but even I could pull these
details off.Then I took a sliver of green stuff and rolled it into a tiny snake. This got flattened across those new abs to make a continuation of the belt. Just like above, I used my sculpting tool to smooth and blend it into the belt on the model. It got topped off with a little 1/4” piece of plastic for a belt buckle.
 I also
rolled a longer snake and used this to make a strap across the Bone‘ead’s chest
and over his shoulder. It gives me a
little something more to make him stand out.
I’m not worried about it being perfect because I’m going to stick gear
all over it.
I also
rolled a longer snake and used this to make a strap across the Bone‘ead’s chest
and over his shoulder. It gives me a
little something more to make him stand out.
I’m not worried about it being perfect because I’m going to stick gear
all over it.One more detail on the Bone ‘ead. I used a spare icon/ clasp from the Space Marine Commander set on his belt buckle. The way I see it, his belt was probably a packing strap on a Baneblade that some Techpriest gave the Bone‘ead as a thank-you present for pushing it out of the mud or something. It’s a small, simple detail that helps the Bone’ead stand out a bit more.
 I wanted to
give my Ogryns pouches and bandoliers to help sell their military aspect and
also to distinguish them from Fantasy Ogres.
The best thing to use was Space Marine pouches. If you play any type of Space Marines, you
know there’s that one double-pack pouch that’s just a bit too big. It’s tough to plant it anywhere on a Marine
and not have it look like a little bit of overkill. But on an Ogryn, scale-wise, it’s
perfect. It looks just like an ACU belt
pouch would look... if you were making them for nine-foot barabrian giants.
I wanted to
give my Ogryns pouches and bandoliers to help sell their military aspect and
also to distinguish them from Fantasy Ogres.
The best thing to use was Space Marine pouches. If you play any type of Space Marines, you
know there’s that one double-pack pouch that’s just a bit too big. It’s tough to plant it anywhere on a Marine
and not have it look like a little bit of overkill. But on an Ogryn, scale-wise, it’s
perfect. It looks just like an ACU belt
pouch would look... if you were making them for nine-foot barabrian giants.Next time I’ll show you how I built some ripper guns for these guys, and also look at the Penal Legion Ogryns I built a while back that were the unofficial test run for these guys.