So, a few years back you may remember I spent ages working
on a Paperhammer Knight. It’s a
fantastic model from Newobmij, and I’m still very proud of how mine turned out.
 That said, a while back you may remebember GW put out their Renegade
box set, with Imperial Knights vs Traitor Knights. Big shock—I loved the idea of Knights that
had fallen to Chaos. Plus, it meant I
could now do fantastic giant robot battles with Marcus.
One of the online bitz sellers I deal with frequently bought a bunch of Renegade
sets and put a lot of Knights up for sale at about half off. Just bare-bones
Knights—not the expansion/ Warden sprue—but still really cheap. Almost
half-off.
That said, a while back you may remebember GW put out their Renegade
box set, with Imperial Knights vs Traitor Knights. Big shock—I loved the idea of Knights that
had fallen to Chaos. Plus, it meant I
could now do fantastic giant robot battles with Marcus.
One of the online bitz sellers I deal with frequently bought a bunch of Renegade
sets and put a lot of Knights up for sale at about half off. Just bare-bones
Knights—not the expansion/ Warden sprue—but still really cheap. Almost
half-off.
I may have made some poor choices.
Anyway, so... now I had some Traitor Knights. A few careful
bids on eBay got me some weapon options without costing me too much (it’s more
about patience than anything else). A
small traitor household began to come together.
The one part that kept eluding me, though, was the missile
pod. People were willing to pay big bucks for one. I’d see them routinely go for $28 or $30. And
I told myself I wouldn’t pay more than a third of that. After losing a dozen or so auctions, I turned
to my bitz jars.
 And here’s what I came up with.
 These two boxes will be the base of our rocket pod. They’re from the classic Rhino set (normally they’d go on the back slope of the treads). I glued the open faces together to give me a solid box. If you don’t have these exact pieces—no worries. There are enough random boxes and blocks kicking through the various lines that will work. You could even just scratch-build a box from scrap plastic.
Next, I very, very carefully found the center point on one of the narrow sides and drilled a hole there. My post is the bottom half of a Lizardma—sorry, Seraphon standard pole.
Helpful Hint—whenever I need to do a hole, I start small. I use a thinner drill bit than I need, because it’ll be easier to place the hole, or to clean it up if you’re a bit off. Then I can expand up to the larger size, using the initial hole as a guide.
 I checked that post from every angle. It’s very important
that it be as straight as possible—perpendicular to the surface of the
box. I checked it multiple times from
every angle.
I checked that post from every angle. It’s very important
that it be as straight as possible—perpendicular to the surface of the
box. I checked it multiple times from
every angle.
Okay, so, while that whole thing was drying, I built two
Havoc Launchers from the Chaos vehicle sprues.
These were just straightforward, standard builds. The only thing worth noting is that I didn’t
use the bracket that normally holds them—just the bare launcher. I also cleaned
the heck out of them as far as mold lines and sprue marks. By nature of being a
weapon and a conversion, I knew this piece was going to get a lot of
attention.
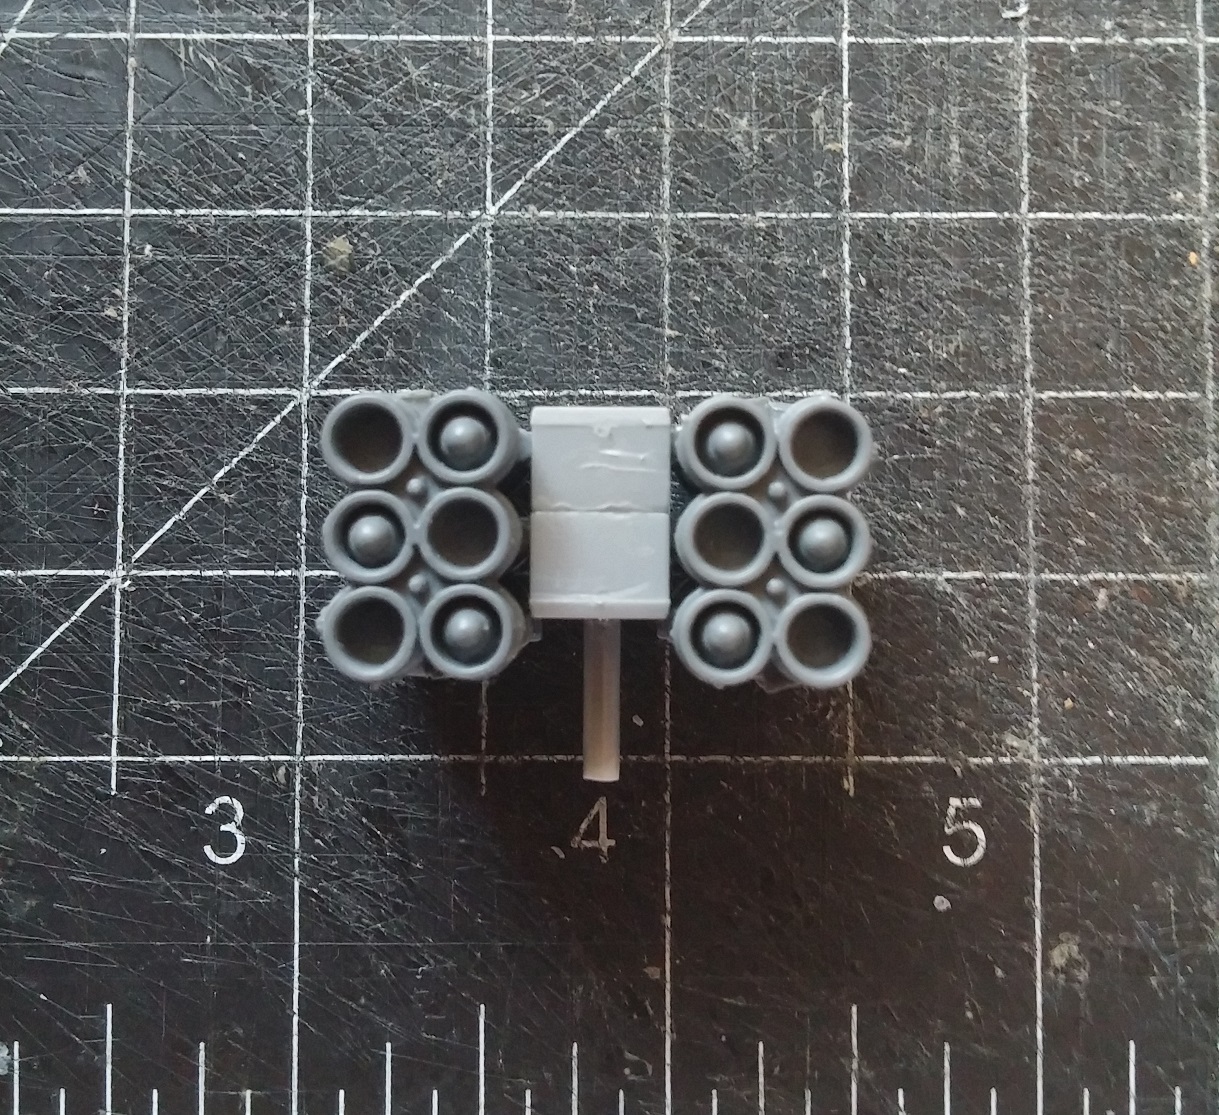 Once they were relatively dry, I glued them onto either side of the box. This took a little bit of work and
patience. I wanted them to be flat
across the top, but they also needed to have a lot of surface area touching the
boxes for the glue. It required some
wiggling.
Once they were relatively dry, I glued them onto either side of the box. This took a little bit of work and
patience. I wanted them to be flat
across the top, but they also needed to have a lot of surface area touching the
boxes for the glue. It required some
wiggling.
Helpful Hint—once I had them more or less in
place, I flipped the whole thing over, letting it stand on its head to
dry. That way the top of the piece would
dry flat, even if things slipped or settled.
Now, the next part was tricky. I had a post that fit in the top socket of the Knight, but I needed a bracket to hold the pod upright and stable. I dug through some random scraps and found some plastic tubing that was just about the right size to fit in the ring around the socket. A little work on the edges with a file and it fit perfectly! I could cut a short section and set it around the post, so the two elements would each lock into place.
Now, the next part was tricky. I had a post that fit in the top socket of the Knight, but I needed a bracket to hold the pod upright and stable. I dug through some random scraps and found some plastic tubing that was just about the right size to fit in the ring around the socket. A little work on the edges with a file and it fit perfectly! I could cut a short section and set it around the post, so the two elements would each lock into place.
 But... it needed to be perfectly centered. Even a little bit off and nothing would
fit. I’d have to cut it off and try
again. I mulled on this for a few minutes
and then realized the answer was right in front of me. The ring and socket on the knight were
already there. I just needed to fit the tube section and pod into place and
they’d center themselves. The only worry
was being cautious with the glue so I didn’t accidentally attach the whole
thing right now.
But... it needed to be perfectly centered. Even a little bit off and nothing would
fit. I’d have to cut it off and try
again. I mulled on this for a few minutes
and then realized the answer was right in front of me. The ring and socket on the knight were
already there. I just needed to fit the tube section and pod into place and
they’d center themselves. The only worry
was being cautious with the glue so I didn’t accidentally attach the whole
thing right now.
So, I set the pipe section into the ring, carefully applied a thin coat of glue
to the top, and then slid the pod’s post through it into the socket. The whole
thing settled snugly into place, and I waited about ten minutes before checking
to see if I’d messed something up somehow.

And look at that. A perfect little
bracket for mounting on top of the Traitor Knight. Exactly lined up and centered. It keeps its place so well I can take it on and off with no problem at all. it's solid when it's in place, but pops right off for transport.
Anyway... at this point the missile pod was more or less done, but I wanted to add just a few details to make it look more solid, more like the original pod and even more Chaos-y. So I dug up another one of those vehicle sprues and clipped off a few more things...
 The big Horus eye plaque for the Land Raider fit almost
exactly across the top of the missile pod. That helped to tie it all together
so it looked a little less cobbled together. I also added in a strip of plastic
here to fill a small gap. Next, the
regular missile launcher has a sort of antenna/sensor array that wraps around
one side. I wanted to imply that, and
found out that one of the curved spiky bits (usually used to line hatches and
turrets) worked like a dream for this.
The big Horus eye plaque for the Land Raider fit almost
exactly across the top of the missile pod. That helped to tie it all together
so it looked a little less cobbled together. I also added in a strip of plastic
here to fill a small gap. Next, the
regular missile launcher has a sort of antenna/sensor array that wraps around
one side. I wanted to imply that, and
found out that one of the curved spiky bits (usually used to line hatches and
turrets) worked like a dream for this.
For a few final details... a spare lens from the bitz bins
(I think it might be from the basing kit) helped fill up some space in that
center section.
And there you have it. A $30 missile pod for... well, one afternoon of rooting through my bits.

Giant robots need giant missile pods.
ReplyDeleteWell done!
Thank you!
DeleteHopefully it will kill many of Matt's Blood Angels...